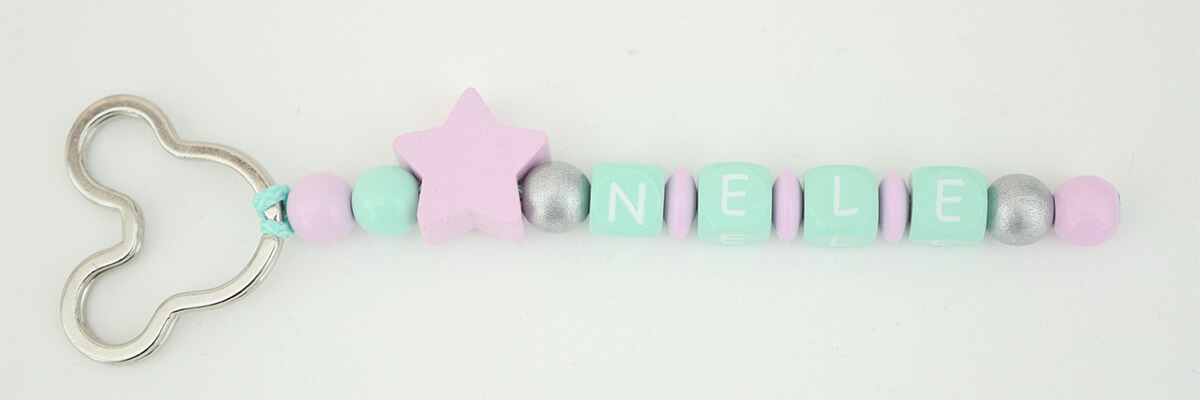
Handicraft Instructions ABC Chain With Calculator Chain and Name
Educational Fun on the Go: ABC Chain With Calculator Chain and Name
Your protégé is starting school? How exciting! An individual ABC chain with calculator chain and name is a fantastic present for school beginners. Thanks to its key ring, this practical beadwork can be attached to the child's school bag or pencil case, for example. This way the offspring can playfully learn the alphabet and the number range up to 20. These step-by-step instructions explain how to make your own individual arithmetic chain with alphabet chain as well as name chain.
The ABC chain and the arithmetic bead string may be long, nevertheless this project is easily made. Schedule about 20 minutes for this crafting project. We hope you'll enjoy it!
If you want to spend even less time on handicrafts, we recommend making a pacifier chain for babies. Take a look at our other crafting tutorials for children's accessories as well. Schnullerkettenladen provides you with the necessary colourful handicraft material.
Interesting questions and answers about the arithmetic chain and the ABC chain in advance
A calculator chain has 20 wooden beads, 5 of which alternate in a different colour. There is a good reason for this, because it awakens the so-called "power of 5". This means that the child learns to see 5 beads at once and to recognise them as such – instead of laboriously counting out each individual bead.
With the arithmetic chain your child can learn the following:
An ABC chain is a bead chain that represents the complete alphabet thanks to letter cubes or letter beads. It is a practical educational toy for pre-schoolers and older children who want to learn the alphabet.
The children can learn the alphabet with the ABC chain by either reading the letters from A to Z over and over again – or they first think about the letters’ order step by step in their mind and then look up the solution using the chain.
Video instructions for making an arithmetic chain with ABC chain and name

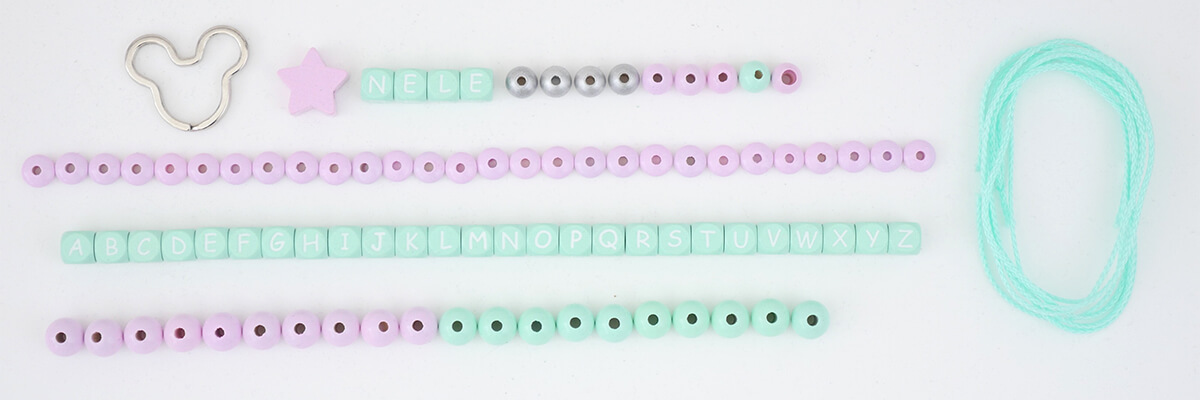
The handicraft material you need for making an alphabet chain with arithmetic chain and name:

The small tools you need:
 scissors
 lighter
 tweezers
The handicraft material you need for making an alphabet chain with arithmetic bead string and name:
Step 1: Experimenting With Beads

Think about your ABC chain's, calculator chain's as well as name chain's designs by laying the material down. Arrange the beads and letter cubes until you are satisfied.
Tip: We recommend using a safety bead at the name string's and the ABC string's ends. A safety bead has a larger hole in which the knot can disappear.
On the other hand, a security bead is not helpful for the arithmetic bead string. That's because the child should be able to push the calculator chain's beads back and forth. Thus, they shouldn't remain rigidly in place. In our example we also used larger beads for the arithmetic chain to make it easier to grip.
Also note that you use more cord for the calculator chain than you use beads. That's because we need a few centimeters of blank cord at the end. Only then it is possible moving the beads back and forth.
Step 2: Attaching the Keyring

Are you satisfied with your design? Great! We start with the first strand: the name chain. Double a sufficiently long piece of PP-polyester cord. Pass the resulting loop through the keyring from behind and then pull it back over the keyring from the front. Doing this creates a knot.
Step 3: Preparing the Stringing

For easier stringing we're using a little trick: Put the two cord ends together so that one of them protrudes about 2 centimetres. Now melt both ends slightly with a lighter. Use your fingers to press the lower cord end slightly against the protruding one. This way you can string the wooden beads onto the double cord more easily thanks to the protruding end.
Step 4: Stringing the Wooden Beads

Let's string the name chain: It is recommended not to string the security bead yet. Because there's a little trick to making it fit tighter. To do this, pull the two cord ends apart again and make a simple knot on the wooden bead in front of the safety bead.
Step 5: Making the Bead Strand's Final Knot

With some force, pull the safety bead with its smaller opening first over the simple knot. Make a very tight double knot behind it.
Carefully cut off both cord ends. Weld the knot with the lighter and press it together with your fingers. Press the welded double knot into the safety bead's hole by using tweezers.
Step 6: Making the ABC Chain

Proceed identically for the ABC chain's bead strand. Just repeat steps 2 to 5 with your letter cubes and if you want to other beads as well.
Step 7: Making the Arithmetic Chain

For the calculator chain, basically repeat steps 2 to 4 – with the crucial difference that you deliberately leave a few centimetres of cord visible, i.e. blank, so that the beads can be moved back and forth. The double knot at the bead string's end remains visible as well. Weld the knot with the lighter, so that it is secure.
We wish your child lots of fun in learning through play with its own ABC chain with calculator chain!
Important Notes for Using a ABC Chain With Calculator Chain and Name
For the safety of (prospective) primary school children, it is important to be careful rather than indulgent in case of doubt. Therefore, please observe the following notes regarding the use of your self-made ABC chain with calculator chain and name chain:
Advantages of Using an Alphabet Chain With Arithmetic Chain and Name
You and your child will benefit from these handicraft instructions, because your individual ABC chain with calculator chain and name has many advantages: Design them with motif beads and in colours that will visually appeal to the child you are giving them to. This way, the school child will associate positive emotions with these educational bead chains right from the start.
The keyring can be attached just as desired: to school satchel, pencil case, waistband of trousers or simply to the child's regular key ring. This makes the arithmetic bead chain and the alphabet chain the kid's everyday companions.
If the child is about to get bored, for example while waiting for the school bus or during small breaks, it can keep itself busy by using its individually made educational bead chains. You see: Making a school gift yourself is a great experience!


